Before getting started, keep the following in mind:
- Make sure your Google tag is already installed.
- Ensure you have the correct Google Ads account tracking if you have several accounts.
- Be sure that the Google tag on your website is the same as the one you have specified for conversion monitoring.
Now, let’s begin!
Ads Interface’s New Version
There’s a new version of Google Ads that you may always switch to. Select your design by clicking on Appearance to alter your version. You can choose the latest design or return to the old one now.

Use the instructions below to locate your conversion ID and label in the upgraded Ads version:
First Step
- Open Google Ads and log in with your credentials.
- Navigate to the section to create a new ad design.
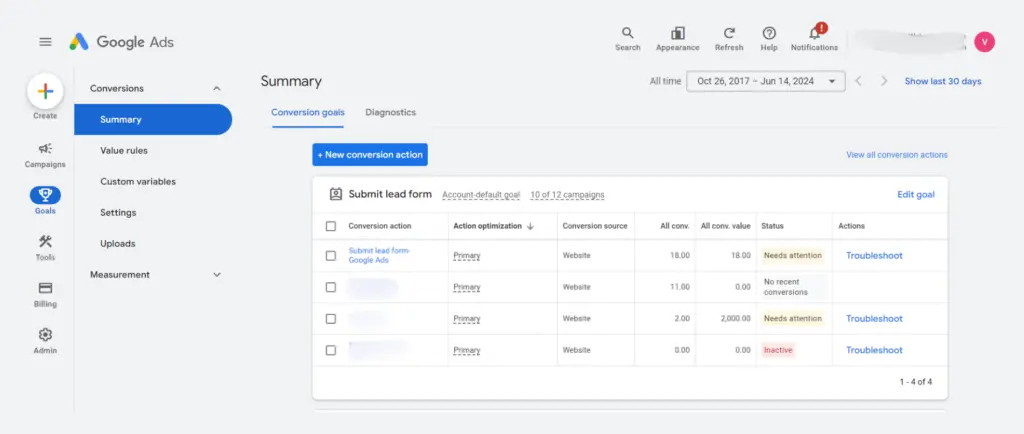
- In the left-side menu, click on “Goals“.
Second Step
- Select the Conversion Action
- Select the conversion from which you wish to obtain the ID and label.
Third Step
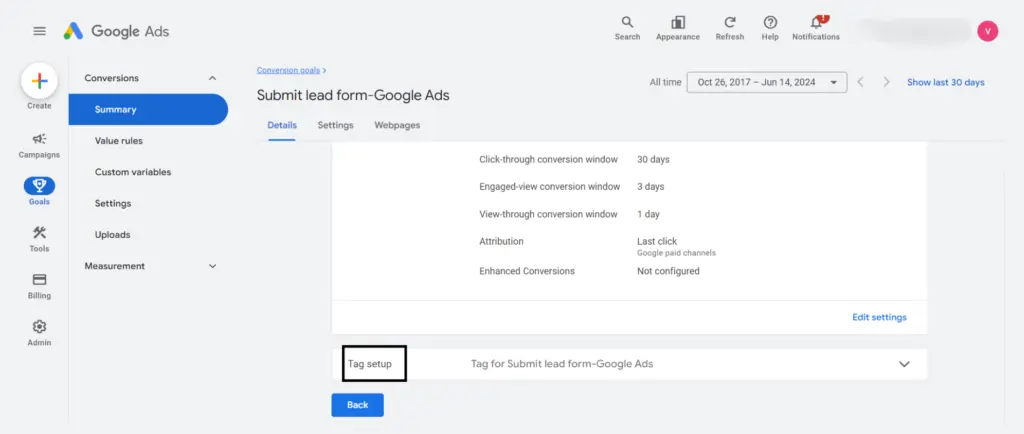
- Configuring Tags
- Select the “Tag setup” area by clicking the arrow icon.
Important: It’s possible that your conversion hasn’t been adjusted appropriately if you can’t view the “Tag setup” section. If so, return to this guide on creating a new Google Ads conversion and follow the instructions to set your conversion from scratch. The “Tag setup” section will appear upon completion, guiding you to your ID and label.
Fourth Step
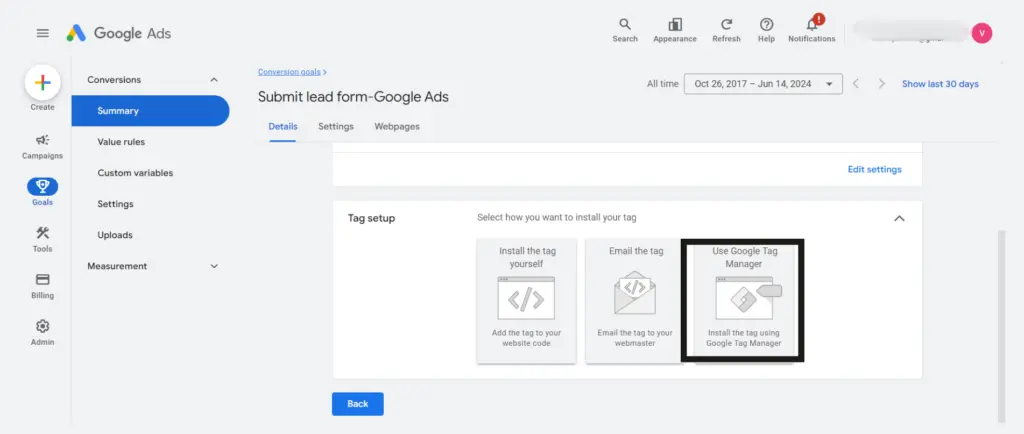
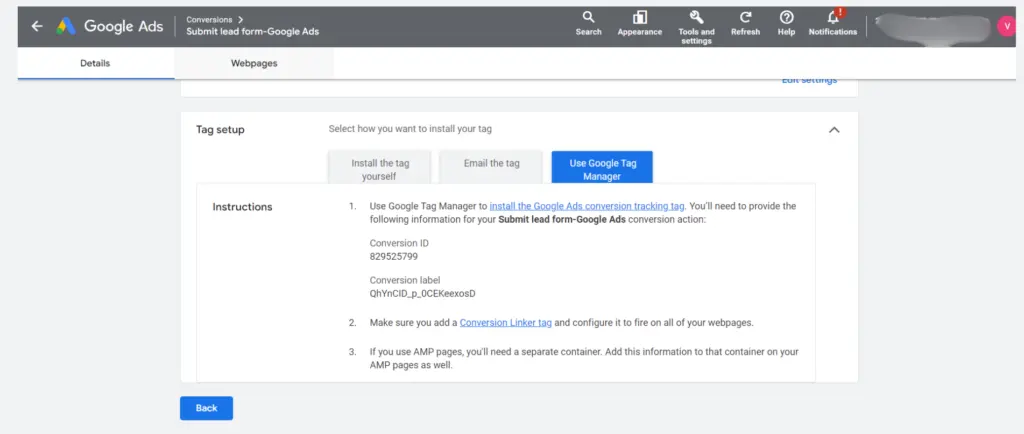
- Select GTM
- Select the option “Use Google Tag Manager“.
Fifth Step
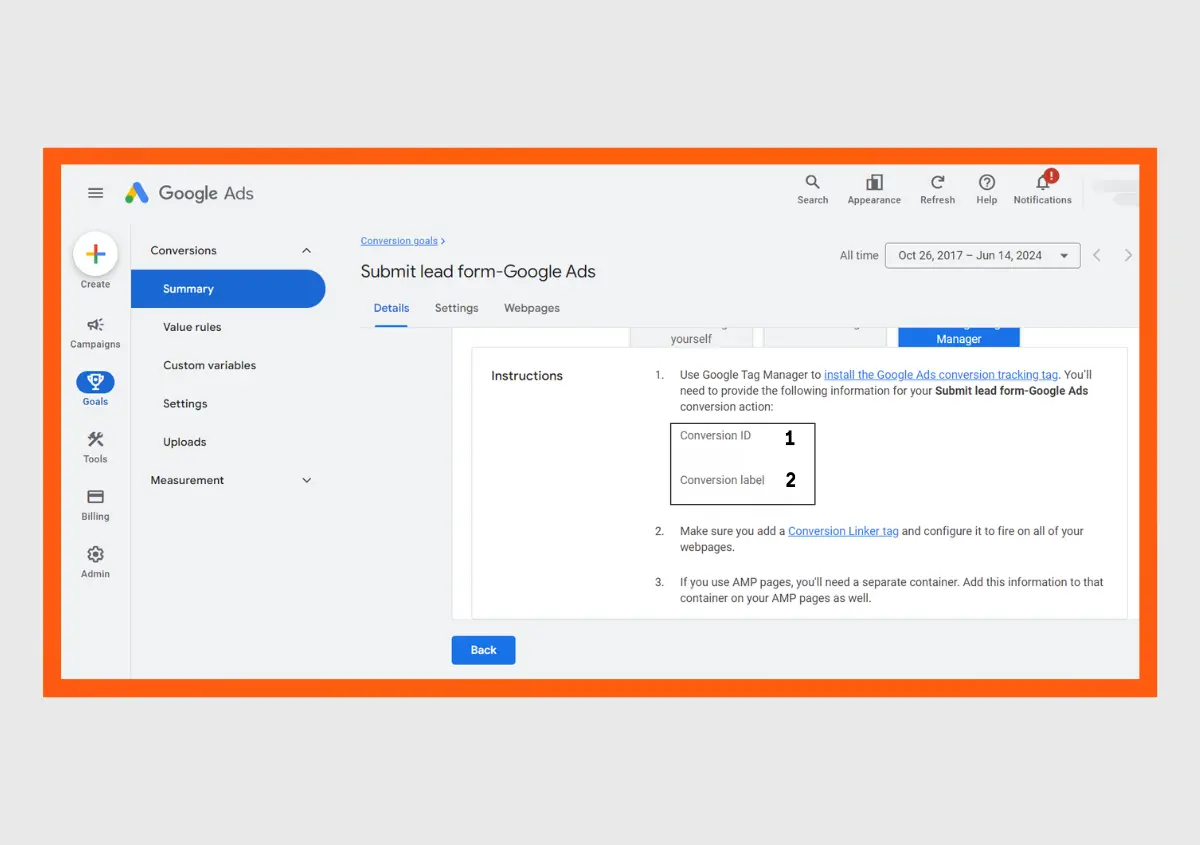
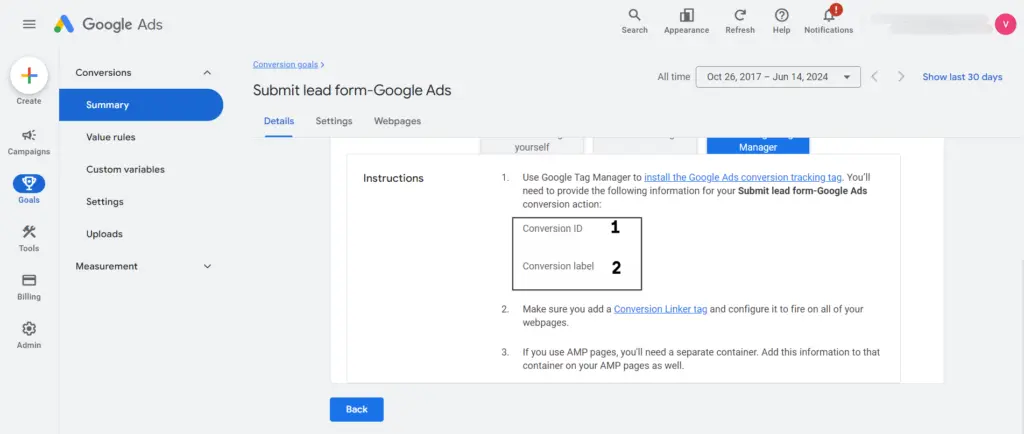
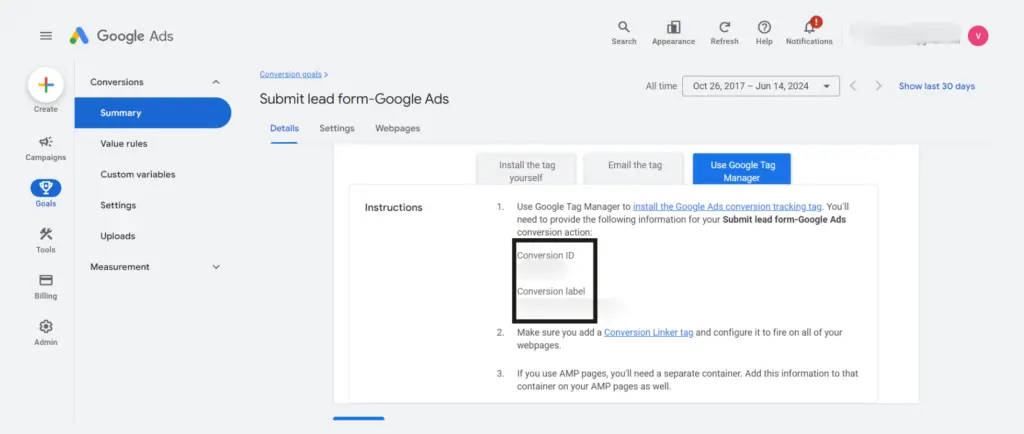
- Your Label and Conversion ID are Ready!
- Here is your Conversion ID (1) and label (2); simply copy and paste them to the appropriate location.
Note: During the Submit lead form Onboarding process, you must enter your conversion ID and label. If not, our setup will not function.
Ads Interface’s Older Version
To view your conversion information if you’re still using the outdated version, take the following actions:
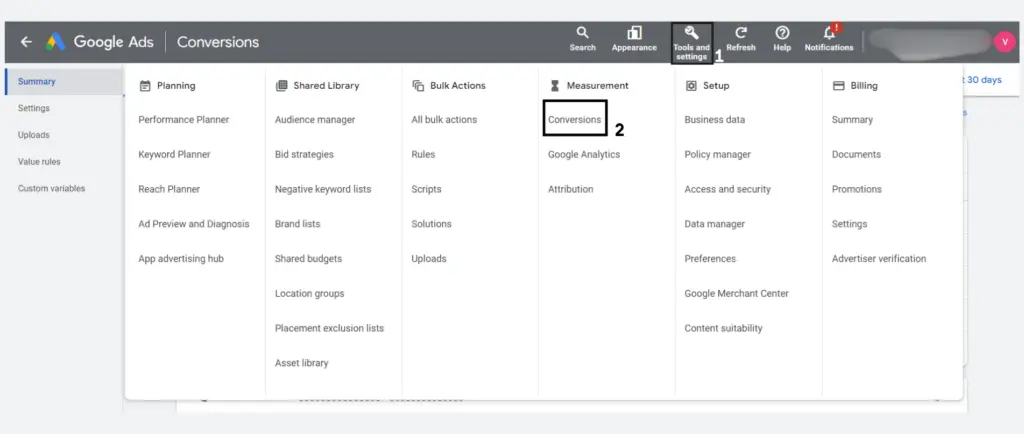
First Step
- Open Google Ads and log in.
- Go into “Tools & Settings” (1) > “Conversions” (2) in your Google Ads account.
Second Step
- Select “Conversion.”
- Select the conversion from which you wish to obtain the ID and label.
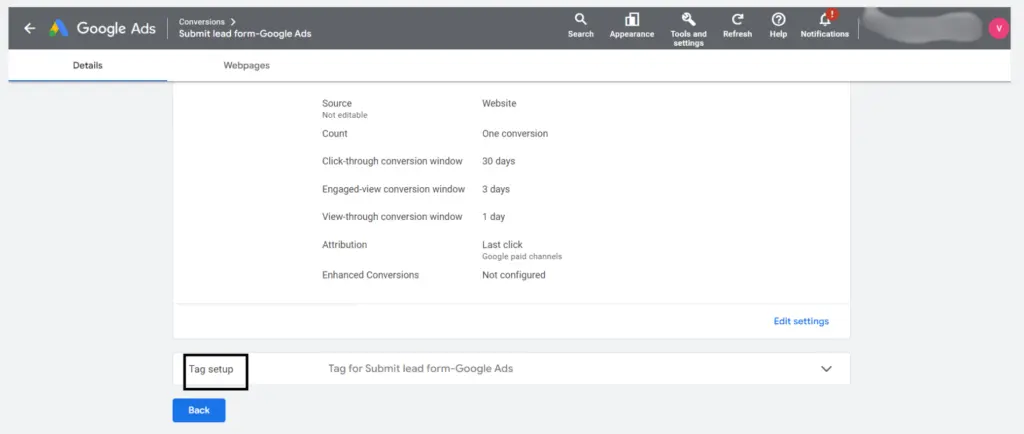
Third Step
- Configuring Tags
- Select the “Tag setup” area by clicking the arrow icon.
Important: It’s possible that your conversion hasn’t been adjusted appropriately if you can’t view the “Tag setup” section. If so, return to this guide on creating a new Google Ads conversion and follow the instructions to set your conversion from scratch. The “Tag setup” section will appear when finished, directing you to your ID and label.

Fourth Step
- Select GTM
- Select the option “Use Google Tag Manager“.
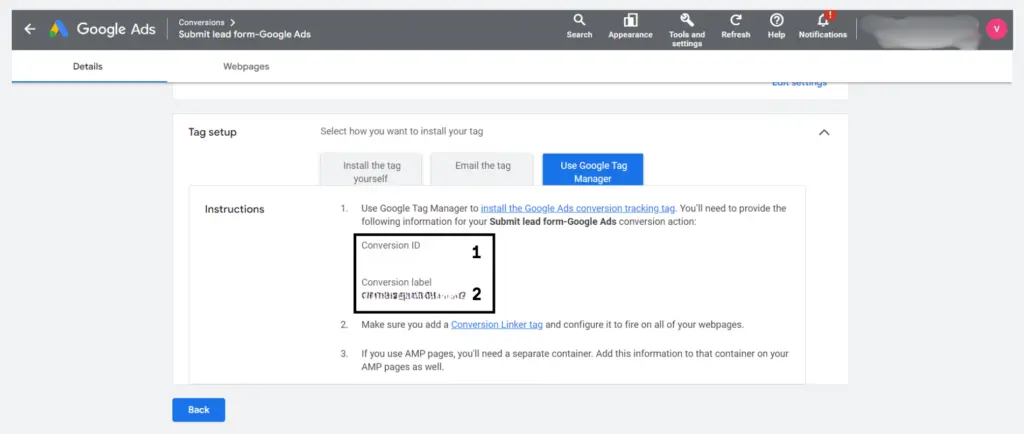
Fifth Step
- Your Label and Conversion ID are Ready!
- Here is your Conversion ID (1) and label (2); simply copy and paste them to the appropriate location.
Note: During the Submit lead form Onboarding process, you must enter your conversion ID and label. If not, our setup will not function.

Read Also: 14 Reasons Why Google Ads Disapproved?
Final Words
And that’s it! Now that you can find your Google Ads Conversion ID, you can monitor conversions for your Google Ads campaigns.

